Showing posts with label bill granger. Show all posts

Wednesday, 16 January 2013

miso eggplant

Last weekend I did one of the dopiest things; hopped along to the Myer one day sale after hearing about the 40% off books, bought myself a book and came home realising that it was already sitting on my shelf. And you know what, that's exactly something my dad would do although dad would just add it to his collection. In my case, I promptly went back to Myer the next day and returned mine; I think the lady behind the counter felt a little sorry for me and offered some reassuring words that publishers these days keep changing those damn covers to make things confusing (which I do agree with!)

Which brings me to this post for Miso Eggplant. The book I have, bought again and then returned is in fact 'Bill's Everyday Asian'. It's been a good while since I've flipped open this book and now that I have, I've been cooking from it everyday. Can't believe I nearly forgot how simple Bill's recipes were!

Not quite as impressive looking as the photo in the cookbook but tastes fantastic!

Heat a wok over medium-high heat. Add 3 tbsp vegetable oil and when hot, stir-fry 500gm chopped eggplant for 10 minutes. Mix 2 tbsp mirin, 2 tbsp soy sauce, 1 tbsp caster sugar and 1 tbsp white miso paste in a small bowl, add to the work with 4 spring onions (cut into 5cm lengths) and stir fry for 1 minute. If you cover the wok with a lid half way, you should be able to reduce the cooking time by about 3-4 minutes. Just check the eggplant to see that it's reached the level of softness that you're after.

This is a dish that hardly takes any time to make but packed full of vegie goodness. More Bill posts to follow!

Sunday, 17 October 2010

apricot bars

I have friends that are daunted by the task of baking and whilst I wouldn't call myself a pro baker, I'm reasonably comfortable with using the oven and over time, the oven has become a rather good friend of mine and seems to work with me to get things right. Occasionally, some recipes don't seem to work so well (and here I blame some recipe books that have gone too quickly to print and haven't been road tested) but probably the largest factor in a failed recipe is laziness. It's when I duck upstairs to do something else and forget about watching the oven or in a rush, I forget ingredients (e.g. leave out the sugar) or I do steps back to front and ruin how the ingredients should be incorporated. 

Making this recipe for Apricot Bars from Bill Granger's 'Simply Bill', the mistake I made was one I always make - forgetting to let it cool in the tin before lifting it out of the tray which I guess is only a small thing for an otherwise tasty recipe.

Preheat oven to 180 degrees. In a large bowl, mix together 155g plain flour, 95g brown sugar, 115g caster sugar, 2 pinches of salt and 1 tsp baking powder. 

Rub into the dry mix 175g chilled and diced unsalted butter.

Mix in 130g rolled oats and 90g dessicated coconut.  Reserve a cupful of dough and press the remainder evenly into a lightly greased and lined 20x30cm baking tin. Bake for 15 minutes until golden.

Put 450g chopped dried apricots and 125mL of water in a small pan over low heat and cook, stirring occasionally until the liquid has been absorbed. Cool slightly, then spoon over the baked dough base. Dot 100g apricot jam over the apricots and crumble the reserved dough over the top. Spoon on 40g melted unsalted butter and bake for 30-35 minutes until lightly golden. 

Do what I didn't do - Leave to cool completely in the tray (otherwise what happens is that you'll crack and crumble the base if you try to lift it out of the tray whilst it's still hot).

Slice into squares, eat away and store the rest in an airtight container. Makes 24.

Probably the other daunting thing about baking is that you can never be too sure how your baked goods are going to be received by those that eat it. When these apricot bars first out of the oven, my brother had a nibble (argh, he eats like a rat - there's been times when I've freaked out thinking a rat has got to whatever I've baked because my brother always takes off a corner where you least suspect it) and his comment was that it was 'too crumbly' (which is the case as it needs to cool down before it becomes more solid). I thought these bars tasted quite healthy and this was echoed by my mum and aunt who both prefer a slightly less sweet baked treat. My cousins seemed to prefer the chocolate cookies I made and it was quite consistent that the boys seemed to show an aversion to this apricot bar - probably because it looked to healthy.

Baking really is an art and well, you can never be too sure how it's going to turn out but it's it a bit of fun and I actually find it really interesting what you learn about people's tastes and what they prefer and yes, my brother eats my baked goodies like a rat!

Saturday, 18 September 2010

rustic cherry tart

Of the various goodie bags purchased at this year's Good Food & Wine Show, my favourite was the pack of four frozen pastries from 'Careme Pastry'. It was actually the first stall I stopped at and one of the one's which I hovered around for some time trying everything on offer till it got to the point where it only made sense to buy all the products in a goodie bag and take them home to enjoy. 

Into the freezer they went when I got home, then I went on holidays for 2 weeks and came back busy at work and it wasn't until the other day when I was opening the freezer looking for a pack of dumplings that I realised that the pastry was sitting there and trust me, it was beckoning me to be used!

Careme Pastry's 'All Butter Puff Pastry'. When using, take out of the freezer and defrost at room temperature for 1-2 hours - each box contains 1 square sheet of deliciousness!

Preheat oven to 200 degrees. Start by making the frangipane. In a bowl, mix 75g softened butter, 90g caster sugar, 80g ground almonds, 2 egg yolks and 1/2 tsp vanilla extract by hand until combined.

Refrigerate frangipane until chilled.

(FYI: 1 sheet of puff pastry will make two tarts.) Slice the defrosted puff pastry into two. Lay one half on a piece of baking paper sitting on top of a baking tray. Using the sharp point of a knife, and being careful not to cut right through, score a 1cm border around the edge of the puff pastry.

Prick the entire surface of the puff pastry with a fork.

Brush the puff pastry with egg yolk.

Spread the chilled frangipane evenly over the pastry within the scored area.

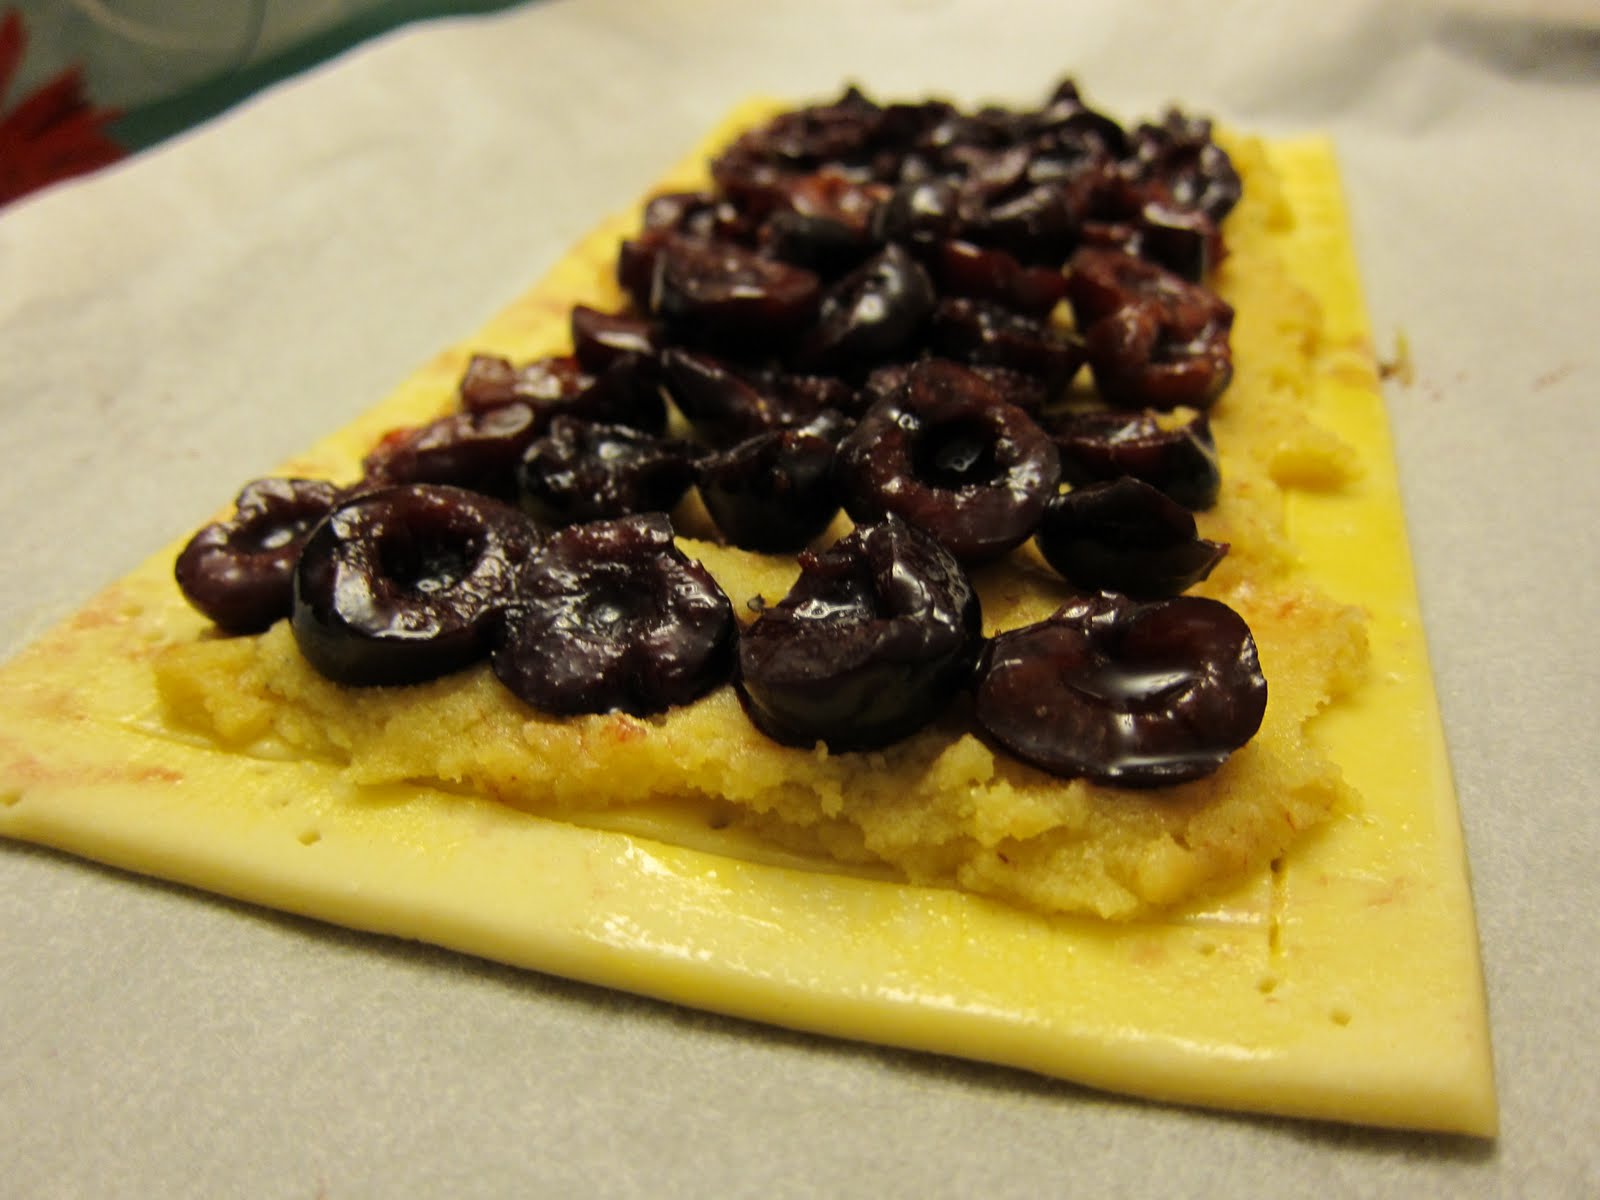
Place 150g defrosted cherries which have been sliced in half, cut side up in a single layer on top of the frangipane. Repeat above steps for the second half of the pastry to make the second tart (FYI: you'll use up 1 box of 300g frozen cherries to make the two tarts).

Bake in the oven for 15 minutes. Sprinkle with some caster sugar and bake for another 5-10 minutes until the sides are golden and puffed.

The recipe suggests you serve this one with cream but really, it's just as good by itself.

The one sheet of pastry/two starts will comfortably feed 12 and they are really very yummy. The star of the dish is definitely the pastry - layers of flaky goodness when baked and unlike other pastries I've used in the past (including puff pastry I've made myself), you don't have butter seeping out at the bottom soaking up the tart and it doesn't feel like you're eating load and loads of butter. This recipe could definitely be improved using fresh cherries as I found the water content of the frozen ones made the frangipane quite runny but on the whole, tops to Bill Granger for another stella recipe!

The three other boxes of pastry I have at home are all shortcrust pastries so I'm on the search for some good recipes to use. If you have a good one, do let me know!

Wednesday, 1 September 2010

healthier date & chocolate brownies

Is there anyone out there who agrees with me that dried pitted dates look like dead cockroaches? Have a look at the pic below, doesn't it look like a pile of dead cockroaches to you? Well it does to me. The boy just looked at me strangely when I voiced it out aloud and shook his head. What type of person, whilst in the middle of slicing up ingredients says aloud that they're cutting up vermin? I guess there aren't too many people out there who do!

Slicing up the dead cockroaches or rather, the 140g of pitted dates. Preheat the oven to 160 degrees and lightly grease and line a brownie tin.

Melt 140g unsalted butter in a small saucepan, add the chopped dates, take off the heat and leave to stand for 10 minutes.

Sift 60g cocoa powder, 90g plain flour, and 1 tsp baking powder together into a large mixing bowl. Add to the mix 95g brown sugar and stir to combine. In a separate bowl, whisk 3 medium eggs and 1 tsp vanilla extract together, then stir in the dates and and butter. Add the dry ingredients and stir until just combined.

Pour the mixture into the prepared tin and bake for roughly 20 minutes. By the way, this recipe is from Bill Granger's 'Feed me now!'

After 20 minutes...

Turn out and cool on a wire rack, then cut into squares.

As per the title of this post, this is a healthier brownie and being healthy is generally where I'm headed at the moment after packing on a few kilos after my recent holiday. It's really not fair that weight comes on so quickly and yet so hard to lose! 

For those making this recipe, you've find that it probably doesn't have as much sugar and butter as most brownie recipes but don't forget that you get a whole lot of natural sweetness from the dates. Aside from the dates looking like dead cockroaches, I really do find them quite tasty and adds sweetness to baking!

Friday, 26 February 2010

anzac cookies

It was a bit out of the blue but I baked a batch of Anzac cookies last night (it just seemed like the celebratory thing to do after sorting out some of the curlier stuff at work). Mum seemed a bit surprised as I usually don't bake on a weeknight but didn't ask too many questions as she carried on with what she was doing. For me, baking is something I enjoy and I enjoy it even more when I'm calm and relaxed (and unfortunately, there's been very few moments of calm in the last couple of weeks!)

Anyway, since I've pulled Bill Granger's 'Sydney Food' off the bookshelf, I haven't quite been able to let go of it. The fact that it sits conveniently on my table means I'm constantly flicking through and bookmarking recipes to try and this happens to be another one of them.

Preheat oven to 160 degrees. Place 1 cup plain flour, 1 cup dessicated coconut, 2/3 cup brown sugar and 1 cup rolled oats in a bowl. Mix well. (No need to sift anything - the roughness of the mix will give the biscuit texture)

Place 125g butter and 1 tbsp golden syrup in a saucepan over medium heat and melt. 

Place 1/2 tsp bicarbonate of soda in a small bowl and add 2 tbsp boiling water. Stir to combine. Add bicarbonate mixture to saucepan and stir. Pour over oat mixture.

Stir all the ingredients together.

Roll teaspoonfuls of biscuit mixture into balls and place on a greased and lined baking tray, leaving room for spreading.

Flatten each ball gently with a fork.

Bake biscuits for 15-20 minutes, or until biscuits are golden brown at the edges. Allow to cool slightly before transferring to a wire rack. For me, this recipe made 32 bite size cookies.

The texture of these biscuits is chewy with a crunchy outer (exactly how anzac biscuits should taste). I find that the ones you buy from the supermarket are usually crunchy all the way through (which if you like crunchy, by all means, go for them). Recipe was super, super easy to make and all of it took less than an hour. Anyway, gobbled up 3 of these before I went to bed and I'm sure it won't take a long time to get through the rest!

Sunday, 21 February 2010

chocolate chip cookies

Somehow or other, trips to the supermarket seem to end up in me buying yet another bag of choc chips - and well, it's usually the dark choc chips and at last count, I seem to have at least 3 packets sitting in the pantry. Then again, I could say that about the blocks of butter, the flour, and the caster sugar. And let's not forget the cookbooks, the food magazines - I'm sure you get the gist of it.

Whilst I had Bill Granger's 'Sydney Food' sitting around on my table, I got around to making his recipe for 'Chocolate Chip Cookies'. Quoting Bill, these are simply 'irresistible eaten fresh and still warm from the oven' - the cookies maintain a soft chewy centre with nice external crunch to them.

Preheat oven to 180 degrees. Place 125g softened butter and 1 1/4 cups brown sugar in a bowl and beat until light and creamy. Add 1 tsp vanilla essence and 1 lightly beaten egg and stir to combine. Stir in 1 1/2 cups sifted flour, 1/2 tsp baking powder and a pinch of salt until combined. Fold through 1 1/2 cups chocolate chips.
Place spoonfuls of cookie mixture on a lined baking tray, allowing room for spreading. Here I used a fork to squash them down slightly (also to give it a nice pattern on top).
Cook for 15-20 minutes until they turn a nice golden brown.
Allow to cool on the tray for 5 minutes.
Place on a wire rack to cool further.
Recipe says it should make 16 cookies, I made at least 32. To be honest, I think I could just empty the pantry of chocolate chips and bake more of these cookies. They were delicious! I gave these away for Chinese New Year (so every family got a little bag of cookies). With the warm weather, the chocolate chips did melt a little which was a bit of a shame but otherwise I can't really find a fault with this recipe!

Monday, 15 February 2010

granny mac's shortbread

I was starting to enjoy the slightly cooler nights but alas, summer is not over and doing any baking can be a bit of a workout. On one of the cooler nights we've had, I did bake a batch of 'Granny Mac's Shortbread' from Bill Granger's 'Sydney Food'. If you are new to Bill Granger, well let me just say that his recipes are fantastic. I can easily pick up any one of his cookbooks and whip something up - the ingredients he lists and uses are commonly found in the pantry, which is how this batch of shortbread came about after I came home from work on a weeknight.

Sift 2 cups plain flour, 1 tsp baking powder and 1/2 cup caster sugar into a bowl. Add 125g softened butter (try let it soften at room temperature) and rub in with fingertips until the mixture resembles coarse breadcrumbs. Mix in 1-2tbsp of cold water to form a dough. Add 1 lightly beaten egg and combine to form a stiff but workable dough.
Roll out the dough on a sheet of greaseproof paper to form a 20x30cm rectangle. I debated whether to put this in the fridge to let it harden up a little to make it easier to roll but decided against it fearing there would be cracks.
Spread 1/3 cup jam evenly over the dough and sprinkle with 2 tsp ground cinnamon.
Roll up the dough swiss roll style, peeling away the greaseproof paper as you go. At this point, I thought it might've been good to stick the dough in the fridge for a little while just to let it harden up slightly and make it less difficult to roll. Ah well, next time!
Refrigerate for 30 minutes. Preheat oven to 180 degrees.
Remove dough from refrigerator and cut into 1cm slices. Place shortbreads on a lined baking tray.
Bake for 15-20 minutes or until lightly browned.
Cool on wire racks.
When I saw the word shortbread, I was expecting this recipe to be quite buttery and 'short'. The final baked product was neither, it tasted more like a mini cake; not too sweet and actually quite light. J happily gobbled a handful of these with a cup of tea.

Next time I could probably roll these up a bit tighter and cut the slices thinner so that these don't turn out so big. For the first time ever, I made less portions than what the recipe said it would make. This recipe is meant to make 24 pieces of shortbread where I made the 21.

Saturday, 30 January 2010

caramel slice

I think I must've chosen the hottest day to make these but I was eager to bring these along to our NYE bash. The recipe wasn't hard and in normal weather conditions (i.e. under 30 degrees), the recipe would probably work but in my case, I was dealing with 30 degree plus heat and a special piece of equipment was required to get this one happening in my alloted time that day I'd allowed for baking. And what would that be? Well, it was my trusty old fan and I couldn't have done without it and so I've altered this recipe by adding a fan to the list of ingredients. Don't laugh at me!

Ingredients: Base - 125g plain flour, 1 tsp baking powder, 90g dessicated coconut, 115g caster sugar, 125g melted unsalted butter. Filling - 100g unsalted butter, 100g brown sugar, 400ml tin condensed milk, 2 tbsp golden syrup, 1 tsp vanilla extract. Topping - 150g dark chocolate. Most importantly, grab yourself a fan to help you get through the following instructions.

Preheat oven to 180 degrees and lightly grease and line an 18x28cm baking tin. Sift the flour and baking powder into a large bowl, add the coconut, sugar and butter and stir together.
Press firmly into the base of the tin and bake for 12 minutes, or until lightly golden.
To make the filling, put the butter, brown sugar, condensed milk, golden syrup and vanilla in a saucepan over low heat.
Cook, stirring, until the sugar has dissolved (my own tip - make sure you don't have any sugar crystals sitting on the side of the pan/pot as it will burn very quickly). Bring to the boil, then reduce the heat to low and cook, stirring for 5 minutes (until light golden).
Pour evenly over the cooked base, then return to the oven and bake for 10 minutes.
Set aside to cool completely. Time to turn on the fan and put this one in front of it.
Once the caramel is cool, put the chocolate in a heat proof bowl over a saucepan of gently simmering water, stirring occasionally until the chocolate has melted. Spread the chocolate evenly over the caramel. Place back in front of the fan to get the chocolate to set.
Once the chocolate has set, cut into squares (I managed to get 24 out of this batch).
I ended up putting each slice into a muffin holder (which I think is a great idea when you're handling it - if you have warm hands, you don't need to worry about melting the slice when you're eating it).
The recipe actually suggests sprinkling the slice with some sea salt (e.g. Maldon sea salt). I didn't have any on me at the time but I did end up buying a pack of Maldon sea salt after seeing it on sale at the supermarket; so maybe next time!

These caramel slices were so deliciously rich that most of us that night only managed to eat the one and I would recommend the one slice at a time as they can be a bit tooth-achingly sweet. The whole exercise of making caramel slices actually turned out much easier than I thought; I'm not sure why I always thought they were hard to make. Anyway, I'm busily baking away, more recipes to follow!