Wednesday 29 September 2010

penne with pork & fennel sausages

A few weeks back, my mum drew attention to the fact that my dad loves to hoard dried pasta. He buys a pack when he sees it on special yet he never actually cooks pasta. The packs of pasta build up, mum thinks it's because dad knows I like cooking pasta so he buys it for me and well, the overarching result is that mum has needed to give me very occasional reminders about the pasta we have at home and the need for it to be used up. It's a good thing that dried pasta has a long-ish use by date (unlike fresh pasta which I've bought and wasted in the past after forgetting it was in the fridge) and well, it's been a good while since I've made myself a batch of pasta, and well, it's always handy to have bags of pasta at home when you get the sudden urge to cook up a batch!

This recipe has been adapted from 'Great Tastes Pasta' by Bay Books. Start by making the sauce and you'll need a good half hour for the sauce to cook reduce.  

Split 6 Italian Pork & Fennel sausages open, remove and crumble the filling and discard the skins. Heat 1 tbsp olive oil in a large saucepan over medium heat. Cook 1 small finely chopped onion for 3-4 minutes until fragrant and transparent. 

Add 2-3 cloves of crushed garlic, 1/2 tsp chilli flakes, 300g thinly slice mushrooms and crumbled sausage meat.

Cook over high heat, stirring gently to mash the sausage meat for 4-5 minutes or until the meat is evenly browned. Continue to cook, stirring once or twice for about 10 minutes. 

Stir in 1 tbsp dried thyme and 800g tinned chopped tomatoes, then bring the sauce to the boil. Cover and cook over medium-low heat for 20 minutes, stirring occasionally to make sure the sauce doesn't stick to the bottom of the pan.

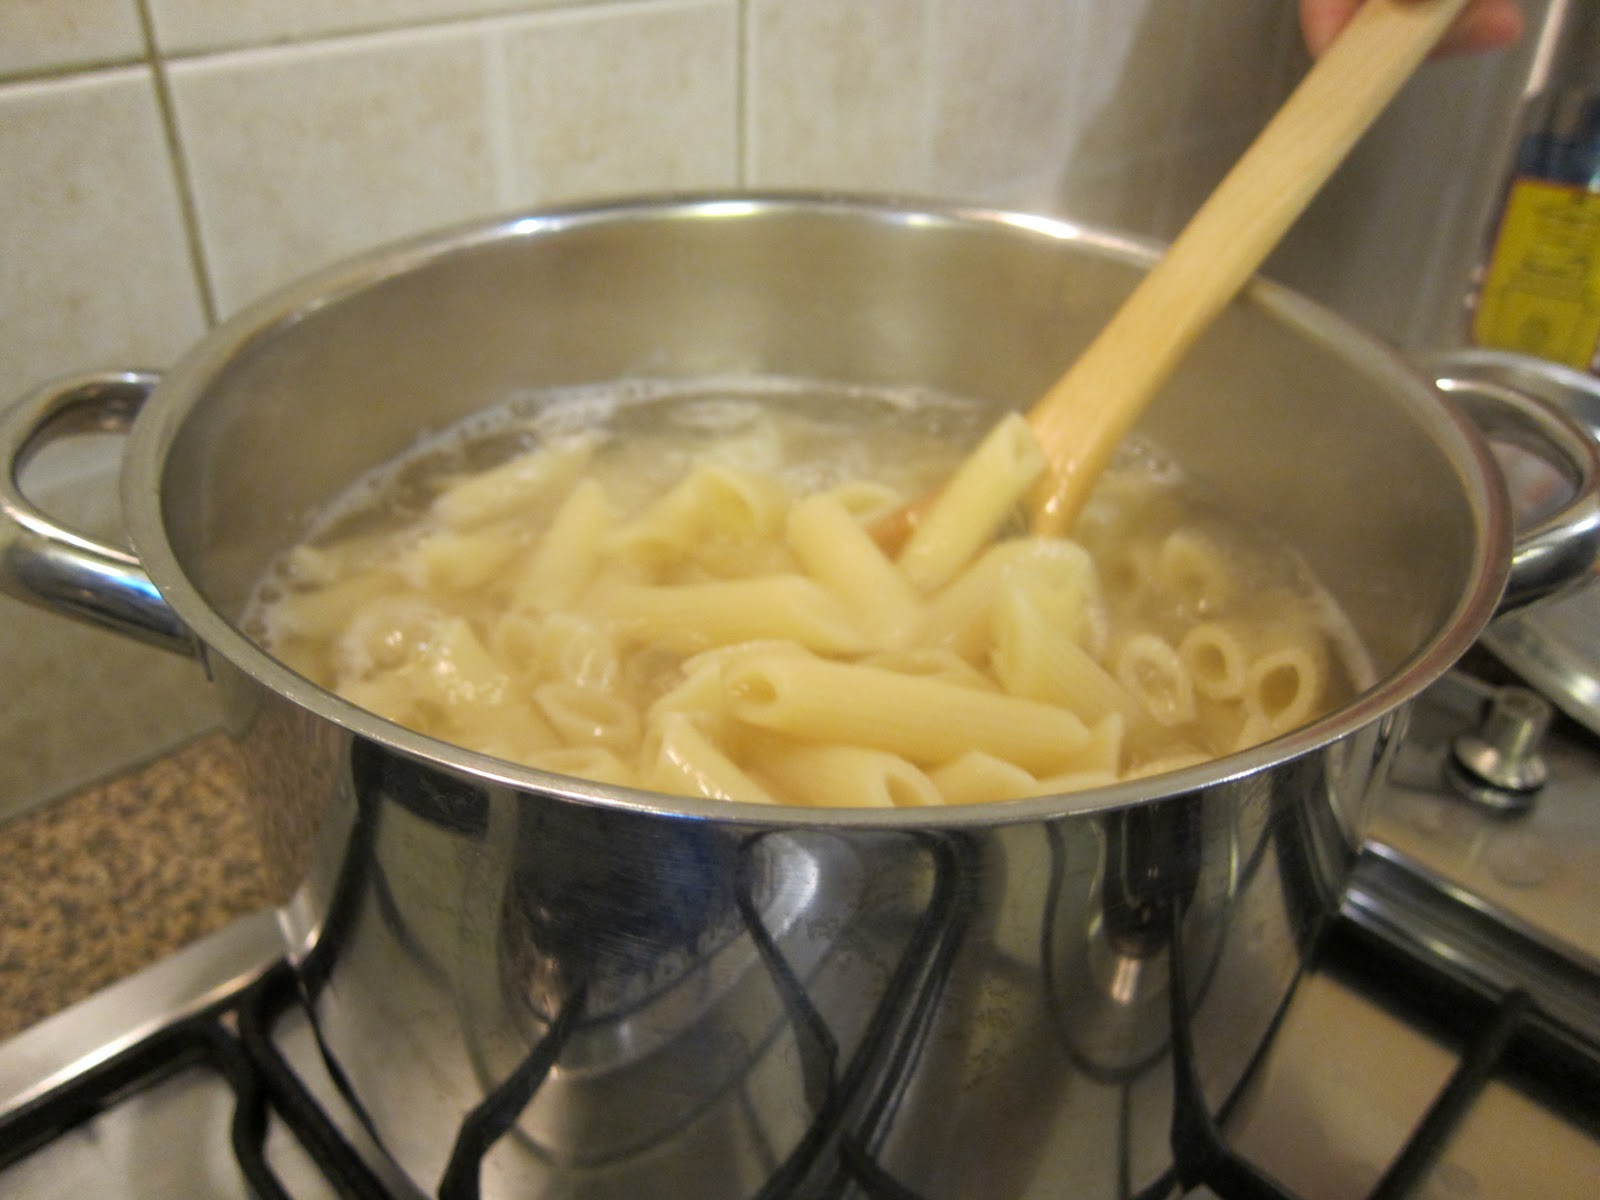
Meanwhile, cook 1 bag penne pasta in a large saucepan of boiling salted water until just tender. Drain well and return to the pan to keep warm.

Add the pasta to the sauce and stir to combine. Serve with grated parmesan cheese.

I'm not usually a big advocate of parmesan cheese but I think the parmesan really makes this dish. My brother had the pasta without the parmesan and found it a little bland and said I needed to add more salt. I usually like a lot of flavour in my pasta and really, I don't think it's the salt, it's definitely the parmesan which gives this pasta its flavour. Anyway, if you get round to making this recipe, let me know how you go!

Monday 27 September 2010

white chocolate & cranberry biscuits

Equaling my obsession with Adriano and his macarons is my fascination for Yotam Ottolenghi and his cookbooks. I recently purchased his new cookbook 'Plenty' off Bookdepository (my favourite website in the world!) and have been drooling over its every page, eager to cook every single one of the recipes. Well I haven't quite got that far yet and actually, I bought Yotam's first cookbook 'Ottolenghi The Cookbook' when it first came out (pre. my discovery of Bookdepository) and only just the other week, made my first recipe from the cookbook. Seeing another blog post about the same recipe, it looks the 'White chocolate and cranberry biscuits' are naturally the first recipe to make!

Preheat oven to 170 degrees. In a large bowl, combine 100g softened unsalted butter, 1 tsp vanilla essence, 110g soft brown sugar and 25g caster sugar.

Gradually add in 1 lightly beaten egg.

Sift into the mix 90g plain flour, 1/4 tsp salt, 1/2 tsp baking powder, 1/2 tsp bicarbonate soda and then 80g rolled oats. Stir to combine. Mix in 60g chopped white chocolate and 75g dried cranberries (recipe also recommends dried blueberries for a more 'grown up' biscuit).

Scoop out a bit of the mix with a spoon and use hands to roll into a ball. Press the balls lightly onto lined baking trays. Make sure you leave a good 6-7cm apart as they tend to spreadh quite a bit.

Bake in the oven for 10 minutes until they a golden brown. Remove from the oven and allow to cool on the trays before serving.

Makes 25-30. Here's my tray and the pic from the book - they turn out pretty much spot on.

Look at the crunchy crisp texture!

A handful of these were gobbled up as they came out of the oven and throughout the next day - I really do recommend this recipe but do be careful with leaving space between each ball of dough when it goes into the oven; I thought I'd left another room but had a tray of cookies that just started baking into one another! 

There's so many other recipes in the book which I want to make that I'm quite spoilt for choice! Probably will make the teacakes as I've bought a mini kugelhopf tin which is waiting to be used.

Tuesday 21 September 2010

minto @ rowe st., eastwood

I'm not too sure what's gotten into me but all I seem to be eating lately is Korean food, and I love it! My staples are usually Korean pancake, noodles and/or hotpot and visiting Minto on Rowe Street in Eastwood, these were exactly the items I ate! Bizarrely, this dinner at Minto's ended up being a spicy as unknowingly (well we should've known), the boy and I ordered all spicy dishes. Blame it on it being Friday night when I'm usually a bit brain dead and forgot to actually use my brain!

Kimchi pancake that comes served on a sizzling hot stone plate. This is a slight variation to the usual Seafood Korean pancake and in all honesty, the pancake didn't taste spicy at all (though some will contest otherwise when it comes to 'degrees of spiciness' and if you genuinely can not take spicy then probably best not to order).

Mini hot pot with tofu, cabbage and dumplings in a spicy soup served with a bowl of rice and assorted side dishes. This was probably my favourite of the night and a great warming dish for a chilly evening (pun intended!). Again, I didn't find it spicy but keep in mind that I eat quite hot.

Spicy Cold Noodles - a variation on the standard cold noodles and I really think that spicy is better. However, by the time this bowl got to the table, the boy and I were already quite full on the pancake and mini noodles and struggled to get to the bottom of this one.

Our waitress that night, who I think must be an owner, was ever so friendly and joked with us about how we could take spicy food when we ordered our dishes. It should've occurred to us at that point that everything we ordered was spicy but somehow or other, it took all the dishes to get to the table for the two of us to realise that all we'd ordered was chilli in some form or another. Ah well, I hear that chilli is meant to be good for your digestive system and actually increases your appetite! Anyway, I need to come back here and try some of their non-chilli dishes as by the end of the night, all I could taste was just chilli! I guess the downside of chilli is it does have a rather overpowering taste!

Saturday 18 September 2010

rustic cherry tart

Of the various goodie bags purchased at this year's Good Food & Wine Show, my favourite was the pack of four frozen pastries from 'Careme Pastry'. It was actually the first stall I stopped at and one of the one's which I hovered around for some time trying everything on offer till it got to the point where it only made sense to buy all the products in a goodie bag and take them home to enjoy. 

Into the freezer they went when I got home, then I went on holidays for 2 weeks and came back busy at work and it wasn't until the other day when I was opening the freezer looking for a pack of dumplings that I realised that the pastry was sitting there and trust me, it was beckoning me to be used!

Careme Pastry's 'All Butter Puff Pastry'. When using, take out of the freezer and defrost at room temperature for 1-2 hours - each box contains 1 square sheet of deliciousness!

Preheat oven to 200 degrees. Start by making the frangipane. In a bowl, mix 75g softened butter, 90g caster sugar, 80g ground almonds, 2 egg yolks and 1/2 tsp vanilla extract by hand until combined.

Refrigerate frangipane until chilled.

(FYI: 1 sheet of puff pastry will make two tarts.) Slice the defrosted puff pastry into two. Lay one half on a piece of baking paper sitting on top of a baking tray. Using the sharp point of a knife, and being careful not to cut right through, score a 1cm border around the edge of the puff pastry.

Prick the entire surface of the puff pastry with a fork.

Brush the puff pastry with egg yolk.

Spread the chilled frangipane evenly over the pastry within the scored area.

Place 150g defrosted cherries which have been sliced in half, cut side up in a single layer on top of the frangipane. Repeat above steps for the second half of the pastry to make the second tart (FYI: you'll use up 1 box of 300g frozen cherries to make the two tarts).

Bake in the oven for 15 minutes. Sprinkle with some caster sugar and bake for another 5-10 minutes until the sides are golden and puffed.

The recipe suggests you serve this one with cream but really, it's just as good by itself.

The one sheet of pastry/two starts will comfortably feed 12 and they are really very yummy. The star of the dish is definitely the pastry - layers of flaky goodness when baked and unlike other pastries I've used in the past (including puff pastry I've made myself), you don't have butter seeping out at the bottom soaking up the tart and it doesn't feel like you're eating load and loads of butter. This recipe could definitely be improved using fresh cherries as I found the water content of the frozen ones made the frangipane quite runny but on the whole, tops to Bill Granger for another stella recipe!

The three other boxes of pastry I have at home are all shortcrust pastries so I'm on the search for some good recipes to use. If you have a good one, do let me know!

Friday 17 September 2010

growing tomatoes - week 1

I was at the supermarket the other day and out of whim, I picked up a pot plant of tomato seedlings and decided that I would grow my own tomatoes. It costed me $3 and it's been a week now and thankfully, the plant is still alive and growing strong. It'll be another 8-10 weeks before I see my first tomatoes and I'm sure there's plenty I need to do before that before I'll see anything and well, both mum and the boy are watching me with quite amused expressions everytime I run out the back to give the plant a water. Both think I'm going to kill the plant very soon and yes I admit, that has happened in the past but I'm adamant that this won't be the case this time round!

This was the only pot I had at home. It'll have to do for the time being. In another week or two, I'll need to shop for a larger pot - the instructions recommend you grow these in at least an 80L pot.

The boy kindly picked up some sticks from the yard for me, instructions say to have the sticks in there to control the growth of the shoots. Need to read up on this one but in the meantime, have haphazardly made an arrangement of them in the pot.

Meet my pot of soon-to-be tomatoes!

Really quite excited about my pot of tomatoes! Coincidentally, my copy of Stephanie Alexander's 'Kitchen Garden Companion' came in from Book Depository the other day and has a chapter on growing tomatoes plus recipes which will definitely come in handy. Hopefully in my next update I'll have learnt a bit more about tomato growing and share some tips for those also keen to give it a go! By the way, I can't believe how cheap Book Depository is. My copy of the 'Kitchen Garden Companion' cost me $23.00 and it ended up being the hardback version (when I thought I'd ordered the paperback version). I can't believe how that book can retail for $125.00 here in Australia. Makes no sense to me!

Thursday 16 September 2010

adriano zumbo chocolat cafe @ terry st., rozelle

I admit I do like Adriano Zumbo but I'm by no means a stalker. Actually, I don't deal well with people that hover and lurk around me for no apparent reason and I remember the first time I saw Adriano in person, I was too nervous to even look his way. Anyway, it just happened to be that after seeing Adriano on Thursday night at MidCity, I happened to see him again when I went to his new cafe on Saturday for a catchup with the high school girls. I actually didn't think he'd be in the kitchen but alas he was, and yes, some more stalker-ish pics were taken through the kitchen window!

Anyway, in case you haven't heard, Adriano has moved his Chocolat Cafe to Terry Street in Rozelle. Terry Street is parallel to Darling Street (where the cafe used to be) and to be quite honest, I actually really like the new location. You're pretty much there as you turn into Terry Street from Victoria Road. There's plenty more parking and being away from the rest of the shops, the place isn't quite so manic. There still are the queues but contradictory to what you might expect at his Darling Street Patisserie, you can actually line up in the queue and still have cakes to buy when you're at the head of it.

The girls and I were there for a late lunch. I picked the Blueberry & Spinach quiche to try; it's a rather strange mix of sweet and savoury, it works but I actually prefer the one you see behind, the pumpkin and pine nut. 

I have my usual flat white and bought one each of the twelve macarons on the shelf. My favourite is the Choklet - it's literally a brownie in a macaron and I wish I'd bought myself a dozen of them to happily eat my way through. 

We spot Adriano Zumbo in the kitchen! FYI: The only seating available at the cafe is 9 stools which face the kitchen, separated by the glass window (I was lucky to get a prime spot looking in!)

Artwork decorating the walls of the new cafe.

My favourite part of the wall - an evil looking donut!

A piece of chocolate fondant cake shared between four - the best way to describe this is that the whole piece of cake tastes like the inside of a chocolate fondant (not quite melty but so gooey and decadent); it's so deliciously rich that you'll need to share this one between a few. I wouldn't try eating this one by yourself.

Why not, a picture of Adriano's back!

I'd actually thought that the cafe would have more seating but really, I much prefer the glass window and being able to see inside the kitchen and see all the cakes being made! My biggest and most exciting discovery though from visiting the cafe was finding out that you can actually order the V8 cake that he made on Masterchef. Guess who'll be ordering that cake for their birthday? ME!

I keep reading that Adriano will be publishing his cookbook this year and starting classes. Can't wait for both!!!

Tuesday 14 September 2010

adriano zumbo @ MidCity

Thursday night shopping last week was met with a most pleasant surprise - the much sought after cake genius, Adriano Zumbo was at MidCity doing a demonstration of sugar flowers. I think I pinched myself a couple of times to convince myself that I wasn't dreaming...yes, it was Adriano Zumbo in the flesh standing just a metre away from me and hey, I think he just looked at me!

And to prove that I was there, here's a handful of photos from the night. I love that macaron tower!

Ok, here he is and he's looking my way :)

Adriano's rather cheeky smile whilst he's busy at work.

They were handing out a selection of macarons and cakes on the night. I had my eye on this one and strategically placed myself near where they were coming out of the kitchen and grabbed one straight away when they came out.

Cake innards! Yum!

I was actually in the city doing some shopping (not stalking him) so grabbed another photo from the other side as I was walking back to go down the escalators.

My friend M happily joined me in my craziness as I took the above snaps. The boy wasn't as pleased; he stood at the back, tapping his feet and the initial amusement was quickly replaced with a snarl on the face. Apparently I lurked around the demonstration for too long, taking too many photos and giggled a bit too much at the mention of Zumbo. It's been a good while since I've blogged about Zumbo here...I hadn't forgotten about him, I think I've just found myself falling in love again! Haha...just kidding. I do think he's a cake genius though and would absolutely love to learn how to make his cakes and macarons!

Monday 13 September 2010

banana, chocolate & peanut butter muffins

I kid you not, I have found the ultimate muffin recipe and this is it - banana, chocolate & peanut butter, the best muffin recipe in the world! Hot out of the oven, the chocolate bits ooze out in little melts of goodness and the dollops of peanut butter inside just hit the spot. If you're eating this days later, there's no need to reheat the muffin, it stays moist through and through. Unfortunately, these didn't last very long for me to test how many days they stayed moist for but trust me, taste one of these and you'll be uttering the words 'OMG!' and then proceed to shovel a few more into your mouth.

In a small bowl, melt together 50g plain dark chocolate with 50g smooth peanut butter over a pan of simmering water.

When melted, remove from heat.

Preheat oven to 160 degrees. Line 10 holes of a muffin tray. Peel 3 medium sized bananas and mash in a large bowl. Add to the bowl 100g brown sugar and 60g softened unsalted butter. Mix well. Add 1 beaten egg to the mixture and stir in 1/2 tsp vanilla extract.

Sift into the wet mix 100g plain flour, 50g wholemeal flour, a pinch of salt and 1/2 tsp bicarbonate of soda. Tip in the bran from the wholemeal flour that remained in the sieve. Add 35g just boiled hot water. Fold ingredients together and add the melted butter and peanut butter and stir thoroughly to mix. Stir in 50g chopped plain chocolate.

Spoon just a little of the muffin batter into each liner. Add a teaspoonful of peanut butter to the centre of each.

Cover the peanut butter with the remaining batter, filling the liners evenly.

Bake for 30 minutes until the muffins are well risen and spring back when you press gently the tops.

Makes 9 yummy muffins.

Muffin innards!

I've more or less followed the recipe out of 'Mad about muffins' which I think is the best muffin book written (every recipe I've used so far has turned out superb and are recipes which I refer to time and time again). The recipe suggests you can even use crunchy peanut butter if you are after a bit more crunch but I think smooth peanut butter is the way to go. Typing up this post is making me want to bake another batch!