Showing posts with label sweets in the kitchen. Show all posts

Tuesday, 6 November 2012

the rose bakery's banana cake

If you're ever looking for a cookbook to buy, can I just say that any book published by Phaidon is bound to be a good one. You'll spot the Phaidon logo on the bottom left hand corner of the front cover (you can't miss it) and to date, The Rose Bakery's 'Breakfast Lunch Tea' is probably my favourite. Just love this collection of true, honest, easy to follow recipes and every photograph in the book just makes me want to lick the page! I guess it's just my type of cooking which is why I love it so much.

This recipe for banana cake requires some very ripe bananas. Preheat oven to 180 degrees. Line a loaf tin with baking paper. In a large bowl, beat together 150g unsalted butter and 180g caster sugar until light and creamy. Add 3 eggs, one at a time, beating well with each addition. Mix in 3 mashed bananas and 110mL mixture of milk and natural yoghurt. Add 1 tsp bicarb soda and 1/2 tsp salt with 350g sifted plain flour. Fold in 100g chopped walnuts.

Combine the mixture well and spoon into the prepared tin. Bake for 1 hour or until a knife inserted in the centre comes out clean.

Here's what the book looks like.

Remove the cake from the oven and let to cool before taking it out. The one thing I've learnt with banana bread/cake is to not to eat it straight away but let it sit in the fridge overnight; trust me, it completely changes the texture of the cake. For ages I wondered how to get banana bread to taste like the ones you buy outside at the shops and the trick is to simply stick it in the fridge.

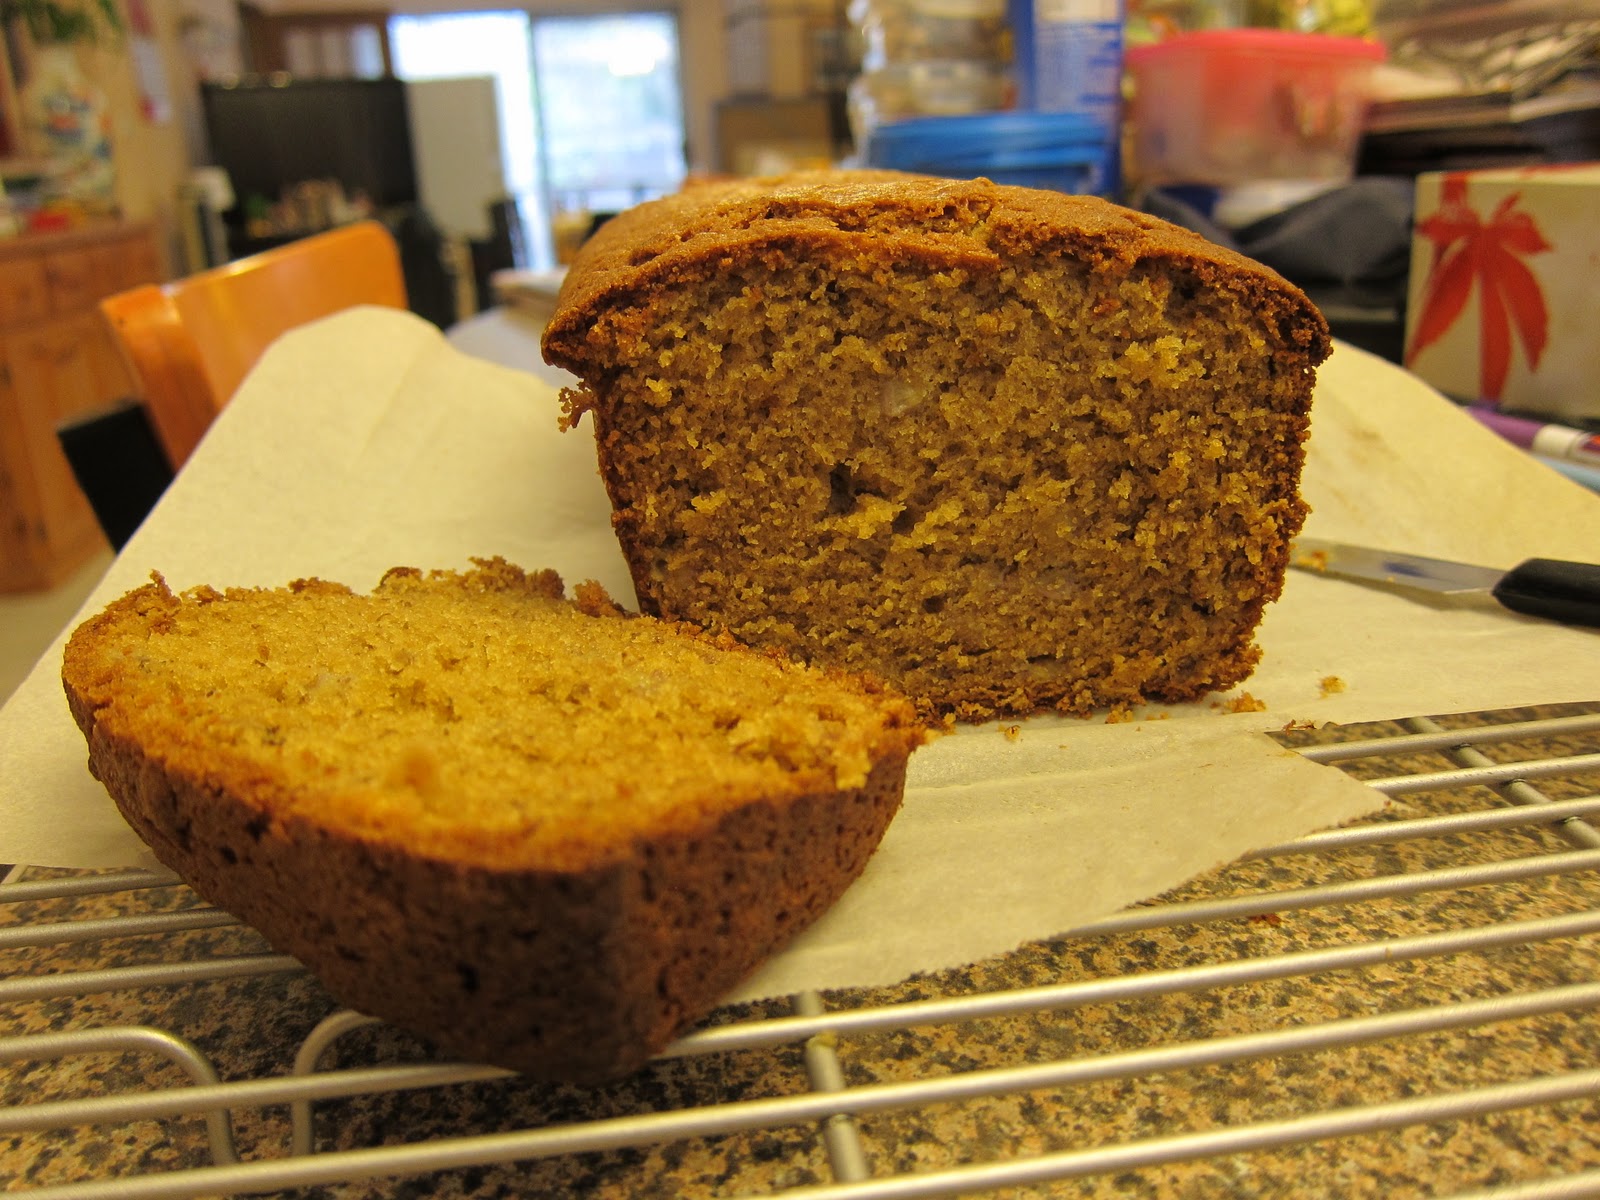
Not a bad looking cake at all. Probably not as sweet or buttery as the banana cake you'll find at the shops but still a good cake at the end of the day.

I'm fast running out of banana cake/bread recipes to try so if you have any good ones, please do send my way. I seem to consistently have a stash of old ripened bananas in the freezer which I don't know what to do with. And yes, I do have a soft spot for banana bread and old ripened bananas are just perfect for it I think.

Monday, 22 October 2012

20 minute apple tarts

You'll find this recipe in Dorie Greenspan's 'Baking - From my home to yours' and it's deifnitely one of the simplest dessert recipes out there. Just four ingredients, an oven and a mere 20 minutes plus maybe another 5 minutes prep time and you'll have your own home-made dessert. Let me show you how!

Start by taking 1 piece of puff pastry out of the freezer and let to defrost. Our apartment is quite warm and find that 15 minutes does the trick. Peel and core 2 green apples; slice in half and then divide again so you have 4 pieces per half a apple.  Using a large round cutter, cut out 4 circles out of the defrosted puff pastry. Assemble half an apple on each round of pastry. Top with 5g diced unsalted butter on each round and a sprinkling of demara sugar.

Bake at 190 degrees for 20 minutes. Apple tarts are ready when the puff pastry has turned a golden brown. Serve with a scoop of vanilla icecream.

On days when I'm a bit too lazy to cut up the rounds, what I do is make one giant apple tart with one slice of puff pastry and apple slices piled in the middle and then all the sides rolled in. Find it actually tastes better as you get a better apple to pastry ratio...yes that does exist! (plus you don't end up wasting the bits of pastry which you end up cutting out) Be fore-warned though that this apple tart does taste better with that dollop of vanilla ice cream; so make sure that's in the freezer before you get started!

Tuesday, 24 April 2012

kit kat chunky caramel cheesecake

As it often happens, whilst I'm waiting for one thing to bake, I then get the idea to bake something else. And well, most of the time my kitchen is accommodating and has everything I need so it's a bit of a no-brainer, I end up staying in the kitchen cooking up a storm. My last post mentioned a generous gift of Kit Kat bars that I received and why not use a few more Kit Kats whilst I'm at it?! This recipe will require three Kit Kat Chunky caramel bars for those interested (though nothing saying that you can't use more if you want) but I do think three is enough to make a mighty good cheesecake.

I do feel rather guilty whenever I eat a bar of these; so chopping them up and eating it sparingly in a cheesecake makes me feel slightly less guilty. There's no logic there but you get the gist of how my brain works.

I've tried making cheesecake base from scratch but no matter how many times I've tried, I find plain graham crackers/digestive biscuits always work a treat. It's stress relieving too - place 175g digestive biscuits in a plastic bag and crush them thoroughly with a rolling pin (be careful though - the bag can break!). Preheat the oven to 180 degrees.

Pour the crushed biscuits into a lined springform baking tin. Pour over 75g melted unsalted butter, mix and pat down firmly into the base of the tin. Chill in the fridge whilst you make the cheesecake filling.

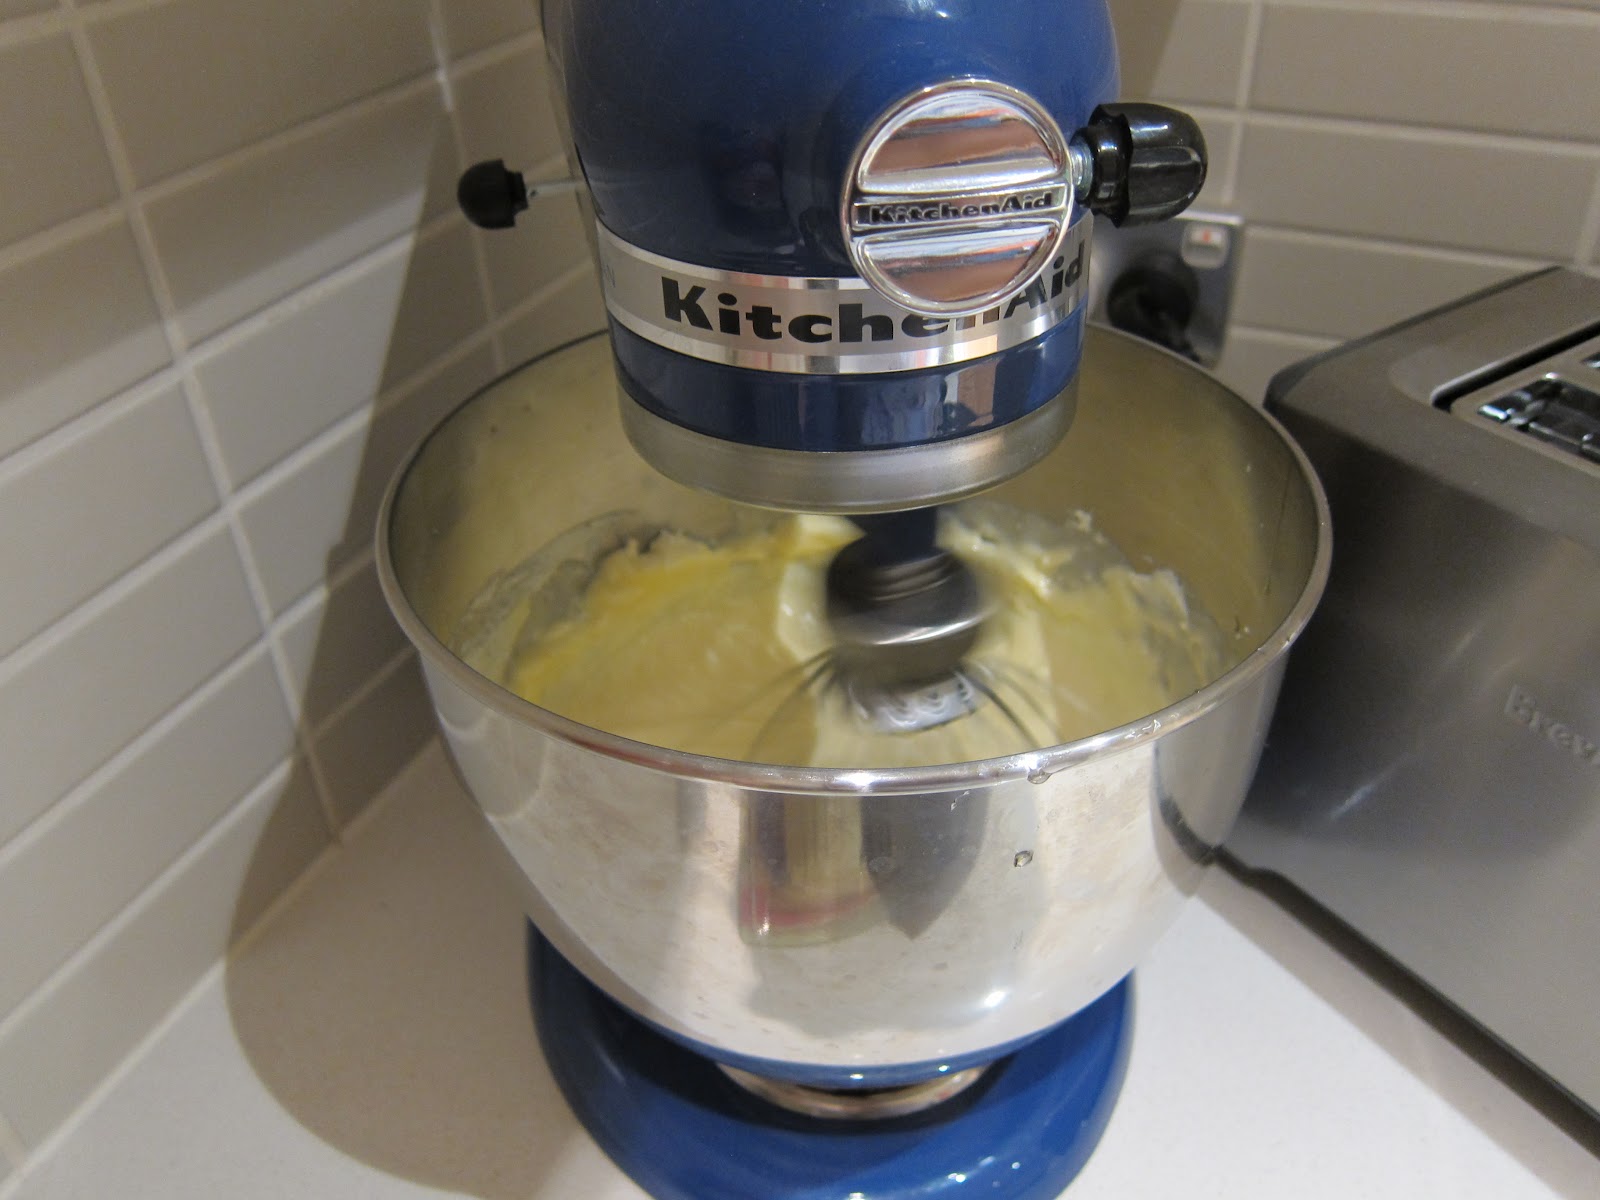
A stand mixer comes in really handy at this point (this is my baby the boy gifted me for Christmas and I love it!) Beat together 450g softened cream cheese, 150g caster sugar, 1 tsp vanilla extract and 4 eggs until the mixture is smooth.

 Time to chop up those Chunky bars (and maybe eat a little bit whilst you're at it).

I lined the biscuit base with about 2/3 of the chopped Kit Kats, poured over the cream cheese mixture and then sprinkled the top with the remaining 1/3 chopped Kit Kats.

 Bake for 50 minutes until the top is golden and there is only a slight wobble left to the cheesecake. Allow to cool in the tin for 10 minutes before running a knife around the edge and loosening it from the tin.

 And what are you waiting for? Dig in!

I think I might be slightly sugar overloaded on Kit Kats but I'll just say that this cheesecake is divine - the texture of the cheesecake light and the Kit Kats give the cheesecake great flavour and texture. I wish someone had told me earlier that I could bake with Kit Kats! Ah well, not too late now, still a few more Kit Kat bars on the kitchen bench for me to experiment with.

Sunday, 29 January 2012

hershey's kisses peanut butter blossoms

It was a trip to Costco last week that I remembered that I had this recipe to post. There's actually no real correlation between Costco to the recipe except for the fact that Costco sells these massive bags of Hershey's Kisses (which features in the recipe) and which I'm tempted to buy everytime I see one. If its not the Hershey's Kisses that I'm seeing at Costco, its those Peanut Butter Cups; even more tasty and probably not so good for you if you eat too many if one go.

This recipe comes from the back of my packet of Christmas themed Hershey's Kisses (Hershey's in green, red and silver foil wrapping - yes I am a sucker for packaging). Preheat oven to 180 degrees. Remove wrappers from 48 Hershey's Kisses chocolates. Beat 125g melted shortening and 3/4 cup smooth peanut butter in a large bowl. Add 1/3 cup caster sugar and 1/3 cup light brown sugar. Add 1 egg, 2tbsp milk and 1 tsp vanilla extract. Stir in 1 1/2 cups plain flour, 1 tsp baking soda and 1/2 tsp salt. Mix to combine.

Shape the dough into 2cm balls. Roll in caster sugar.

Press a chocolate into the centre of each cookie. 

Bake for 8 - 10 minutes.

Remove cookies to a wire rack and let cool completely.

Come to think of it, these cookies are almost peanut butter cups in cookie format! The original recipe actually asks you to press the chocolates in after the cookies have baked and the cookie is still soft but the dyslexic side of me read it as press them in before you bake. Well I can't tell you if the original recipe works but my way worked just fine - the chocolates actually don't melt in the oven but keep their shape. I find peanut butter loves sticking to the roof of my mouth and eating these was no exception. Ended up being a great Christmas treat to share with the extended family.

Thursday, 8 December 2011

coffee cake

I secretly love birthdays; it doesn't even have to be my birthday, it can be anyones and I still love it. I love celebrating, I love giving presents (and of course receiving them) but most of all, I love birthday cake. For years, I've vowed to bake everyone a birthday cake for their birthday but so far I've managed in two instances, the first was for my best friend's 18th birthday and the second instance was just the other Friday where I had the day off work and baked dad his birthday cake. I'm promising myself once again that I'll make more of an effort; it really is worth it in the end.

This recipe comes from The Hummingbird Bakery Cookbook; the very place which I'd love to visit!

Start by making a coffee essence. Put 2 tbsp instant coffee granules and 170mL water in a small saucepan and bring to the boil over medium heat. Boil until reduced by half, then remove from the heat and leave to cool completely. Set aside a tablespoon of the essence to use in the frosting.

Preheat oven to 170 degrees. In a large bowl, combine 450g softened unsalted butter, 450g caster sugar and cold coffee essencewith a hand held electric mixer. Add 8 eggs one at a time, mixing well until incorporated. Beat in 450g plain flour, 2 tbsp baking powder and 2 tsp cocoa powder and mix well.

Line a ring mould as per below.

Pour the mixture into the prepared ring mould and smooth over with a knife. Bake in the preheated oven for 40 minutes or until the sponge feels firm to the touch.

In the meantime, prepare the coffee vanilla frosting by beating 250g sifted icing sugar and 80g softened unsalted butter with a mixer. Combine 25mL milk and a couple of drops of vanilla extract in a separate bowl and then gradually add to the butter and sugar mixture. Once all the milk has been incorporated, add in the reserved tablespoon of coffee essence and turn the mixer up to high speed and continue beating until the mixture is light and fluffy (at least 5 minutes). Prepare the shaved chocolate shaving by grating 60g dark chocolate with a cheese grater.

Here's the cake after 40 minutes!

Place the cake on a wire cooling rack to cool completely.

When the cake is cold, put on a serving plate and cover the top with the frosting.

Decorate with chocolate shavings.

As I was making the cake a day in advance (and with it being extremely hot!), here's the contraption I made to store the cake in the fridge. Had both the mum and boy laugh at me which wasn't particularly nice - especially cause I had to keep cutting away at the skewers until it managed to fit in the fridge!

We had a big extended family dinner the next day and everyone came back home to eat the cake. Despite taking it out of the fridge for a good hour, it hadn't quite defrosted so the texture of the cake was a little hard but smelt absolutely divine. On my second piece, I actually microwaved the slice which returned the cake to its soft and spongy texture, but unfortunately the icing did melt a little. So yes, had I more time that morning of the birthday, it probably would've been better to make it then but otherwise a very lovely cake which ended up being gigantically big (nothing like the pic in the book!)

Happy birthday dad! Hope you had an awesome birthday!

Sunday, 20 November 2011

banana & cinnamon muffins

I'm sure I've mentioned somewhere down the track that I have certain OCDs - collecting cookbooks is probably the worse of them, then its collecting recipes and last but not least, baking with certain ingredients over and over again. November 2011 has been the month of baking with bananas and here I bring you a recipe for Banana & Cinnamon Muffins from The Hummingbird Bakery Cookbook - this cookbook has also been used to death this month (I'm actually not quite ready to return it to the bookshelf - maybe baking constantly from one cookbook is also one of my OCDs?)

Preheat oven to 170 degrees. In a large bowl, combine 350g plain flour, 160g caster sugar, 3/4 tsp salt, 1 1/2 tsp baking powder, 1/2 tsp bicarb soda and 2 tsp ground cinnamon with a handheld electric mixer. In a jug, combine 375mL buttermilk, 1 egg and 1/2 tsp vanilla extract. Slowly pour into the flour mixture and beat on a slow speed until combined. Add 70g melted unsalted butter and beat until incorporated. Stir in 400g peeled mashed bananas with a spatula.

Spoon the mixture into lined muffin tins.

Sprinkle with a little caster sugar and cinnamon over the tops.

Bake in a preheated oven for 25 minutes or until golden brown. A skewer inserted in the centre should come out clean.

Leave the muffins to cool slightly in the tray before turning out onto a wire cooling rack to cool completely. Recipe says it makes 12 muffins, I managed to get 22. I guess it makes 12 really big muffins?

These muffins are incredibly moist and I'd actually class them in the 'healthy' basket. With it being so warm lately, I kept the muffins in the fridge to stop them from getting mouldy (as the moisture in the banana doesn't deal well with the heat). There's a recipe for Banana Cream Pie in the same very cookbook which is looking rather tasty, maybe I'll make that next!

Tuesday, 15 November 2011

banana loaf

As strange as it sounds, one of the highlights of my Europe trip was finding bananas selling for 1 pound a bunch - how very cheap! Actually on our first day there, they were handing out free bananas and um, I may have been a little delirious from the flight, and well I did chase down the man in the banana suit and got a picture with him too! (I'll get around to explaining myself one day but so far I've managed to get a good collection of photos with people dressed up in assorted food related suits).

Fortunately it looks like banana prices are finally dropping back down in Sydney. Noticed how Chatime had a sign up advertising 'Do you remember how banana taste?' (there was something grammatically wrong about the sign which bothered me when I saw it and its somehow stuck - seriously someone should do something about that sign!) But yes, bananas are back down to about $3/kg so mum and I picked up a nice big bunch to eat (and well, usually the case is that they start to brown very quickly so I end up using them for some baking).

Preheat oven to 170 degrees. In a large bowl, combine 270g brown sugar and 2 eggs with a hand mixer. Beat in 200g peeled mashed bananas. Add 280g plain flour, 1 tsp baking powder, 1 tsp bicarbonate of soda, 1 tsp ground cinnamon and 1 tsp ground ginger to the mix. Mix thoroughly until incorporated. Pour in 140g melted unsalted butter and beat until all ingredients are well mixed.

Pour the mixture into a prepared loaf tin and smooth over the top with the spatula. Bake in the oven for about 1 hour or until firm to the touch and a skewer inserted in the centre comes out clean.

Leave the cake to cool slightly in the tin before turning out on a wire rack to cool completely.

Makes about 8-10 slices.

Best way to eat banana bread (in my opinion), is to toast each slice in the toaster and serve with a generous glob of butter. Be mindful to slice the banana bread so that it actually fits into the toaster and whatever you do, don't stick a knife or fork into the toaster if it refuses to come out. Better way to do it is unplug the toaster, tip the toaster on its side and using your finger to prod it out (careful not to touch the hot metal components of the toaster). Occasionally I have had to completely turn the toaster upside down and a whole barrage of crumbs have come down with it (so yes, it does pay to clean/empty your toaster of crumbs regularly).

Anyway, this recipe is from The Hummingbird Bakery cookbook; a collection of some very reliable recipes that consistently come out beautiful from the oven - love it!

Sunday, 13 November 2011

milk chocolate & craisin oatmeal cookies

Coming back from holidays, I came back to a half metre high pile of mail, magazine subscriptions and cookbooks that mum had kindly collected for me - probably the most exciting was a copy of Adriano Zumbo's recipe book which left me quite giddy with excitement! However, just as exciting was this copy of '100 years of sweet baking memories' featuring a collection of recipes all using one of my ever favourite ingredients...condensed milk.

My favourite condensed milk recipe is probably condensed milk and butter spread over toast - I wouldn't say its healthy but its pleasantly sweet and a treat for any day. Well unfortunately my special recipe didn't quite make it into the book but you'll find how versatile condensed milk can be from the range of recipes offered.

Here's the cover! I decided to make the 'White Choc & Cranberry Cookies' but substituting white chocolate for milk chocolate and the cranberries for craisins.

Preheat oven to 160 degrees fan forced. Line two baking trays with baking paper. In a large bowl, cream together 200g softened butter, 220g brown sugar and 125mL sweetened condensed milk. Add 1 egg, 1 1/2 tsp vanilla essence and beat until light and fluffy. Add 225g plain flour, 180g rolled oats, 165g cranberries and 190g milk chocolate bits. Mix well. Place heaped tablespoons of mixture onto the prepared trays and press down each one with a fork.

Bake for 15 minutes or until golden brown. Remove from trays and cool on a wire rack.

Give it a couple of minutes before you dig in - this gives time for the cookies to harden and provide that extra little crunch.

I did toss up whether to use milk chocolate chips or dark chocolate chips and ended up asking mum who thought the milk chocolate would work better. I guess white chocolate and cranberry is one of those matches made in heaven and when you're stuck without white chocolate, milk chocolate would make the closest substitute. 

The cookies ended up tasting great - just the right amount of softness and bite to them. The oats had cooked nicely in each cookie making them still taste a bit healthy whilst being a treat. The boy took a few camping and some into work and before you know it, they were all gone!

Monday, 7 November 2011

blueberry & vanilla financiers/friands

After unpacking my bags and settling back into my bed for a good night's sleep, the first thing I did after coming back from holidays was to get into the kitchen and bake this tray of blueberry & vanilla financiers/friands. My parents had gone out that particular morning and needless to say, when they got back from the shops, they were gobsmacked to find me up nice and early, bouncing around the kitchen and not jetlagged nor still slouched in bed. I tell you, the trick is to watch as many movies as you can whilst on the plane so you fall asleep through them - that seems to be how I managed to get out of it.

Preheat oven to 190 degrees. Grease 9 holes of a friand tray. In a large bowl, whisk together 4 egg whites until frothy. Add 140g sifted icing sugar, 1 tsp vanilla essence, 50g sifted plain flour, 90g almond meal, zest of 1 lemon and fold everything together gently. Spoon into the prepared tray and push several fresh blueberries into the top of each cake. 

Bake for 20 minutes until golden and a skewer inserted comes out clean. Leave in the tray for 5 minutes.

Remove from the tray and let the friands cool on a wire rack. You might need the help of a skewer to help pull the friands from the side of the mould (do so lightly).

I actually didn't get around to trying Financiers (what the Parisians call them)/Friands (what we call them here in Australia) when I was over in Europe; spent most of my time eating macarons and more macarons (OMG they were so good!) However I did end up going to Fortnum & Mason for afternoon tea, which is precisely where this recipe comes from. Will get to posting about my afternoon tea in due course but have to say, their recipes are just as yummy as they are to have there as they are to make at home.

So glad to be back home with a kitchen to bake!

Saturday, 27 August 2011

vanilla honey cookies

I get very excited when it comes to food; and I mean food in all shapes, forms and sizes. Going to the new Costco in Auburn was an absolute ball; all your everyday foods in not so common sizes! I spent a good couple of hours in there going down each aisle, bumped into quite a few people whilst I was at (so yes there are people just as crazy as me) and I really think it is the rage that everyone's been talking about - makes an average day at the supermarket all that bit better!

Here's a rather happy snap of me and my 1.5kg block of unsalted butter. 

 Everyone's trolley had a bag of Reese's Mini Peanut Butter Cups so I packed one into mine. Otherwise, time to stock up on some of my usual baking ingredients. Should last me a good while!

So coming back from Costco, I had a bit more inspiration to bake (it's been a little quiet on the baking front I have to admit) and my eyes went to the Vanilla Honey Cookie recipe in 'The Golden Book of Cookies' which mum picked up for me near her work one day. (I love mum - she knows exactly what I like!) Hopefully here's to more baking as life does seem rather flat when I don't bake.

In a large bowl, combine 350g plain flour, 100g caster sugar, 1 large egg, 90g softened unsalted butter, 2 tbsp water, 1 tsp baking soda, 2 tbsp honey, 1 tsp vanilla extract and salt to form a smooth dough.  Press the dough in a disk, wrap in cling film and refrigerate for 30 minutes. Preheat the oven to 180 degrees. Line baking trays. Roll out the dough on a lightly floured surface to 5mm thick. Use a knife to cut out squares. Brush with a little milk.

Bake until just golden at the edges, approx. 10-15 minutes. I know I really should bake cookies one tray at a time but I never to do it. I just accept the fact that the bottom tray will cook a bit quicker and brown faster so keep an eye out on them and swap the trays or pull them out earlier if required.

Transfer to racks to cool.

I couldn't pinpoint what these cookies tasted like! They're only very subtle in flavour, at one point it reminded me of those Mexican milk buns with the crunchy top which you find at Chinese bakeries. My mum had a taste and said it reminded her of a flat scone. Either way, these cookies taste more like bread/scones than it does a cookie. I guess you could call it a bread scone but cookie portioned? They were addictive to nibble on nonetheless. Anyway, I did buy myself about 10kg of flour from Costco so will be busy baking and baking away!