Showing posts with label in the kitchen. Show all posts

Friday, 29 January 2010

mixed berry friands

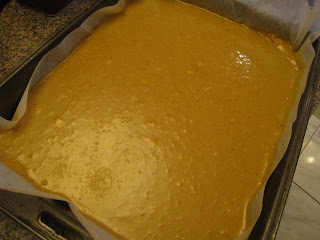
I popped by my old blog the other day and scrawled through entries posted almost 4 years ago and noticed how often I baked friands. I seemed to alternate between blueberry friands and raspberry friands; it's no wonder that the boy started to get addicted to them. And well, you'd think that after so many times baking friands, I would've got the recipe spot on but to this day, I'm still trying to get it right. Here's a batch of mixed berry friands (a good compromise between blueberry and raspberry friands) that were cooked on the 'bake' setting on my oven. Usually I use the 'fan forced' setting but found that the sides of the friand were browning a bit too quickly when I wasn't keeping an eye on the oven.

Ingredients - 180g butter, 160g icing sugar, 75g plain flour, 125g ground almonds, 5 egg whites, zest of 1 lemon, 125g mixed berries.
Preheat oven to 200 degrees. Butter a 12 hole friand mould. Melt the butter and allow to cool. Sift the icing sugar into a bowl, and mix in the ground almonds. Lightly beat the egg whites with a fork for 30 seconds, then stir into the dry ingredients. Add the melted butter and lemon zest and stir well. Divide the mix into the friand tin, top with mixed berries and bake in the preheated oven for 15 minutes. Test with a skewer to check if they are ready. When ready, take out of the oven and cool for 10 minutes before unmoulding onto a cooling rack.
On the 'bake' setting of the oven, the friands came out less brown than usual.
On top of the friands being less brown, I also managed to get a full batch of 12 friands. Usually I manage to only get the 9 or 10. The friands stuck to the tin quite a bit this time but that could've been because I was eager to eat one and tried pulling them out of the tin as soon as they came out of the oven. (Usually when you rest for the full 10 minutes, the sides of the friand pull away from the tin so you can just tip the whole tin upside down and they'll fall out).

On the whole, a success because these friands tasted lovely. And I'm out of berries for now so my next batch of friands will be something a bit different!

Sunday, 6 December 2009

raspberry coconut slice

Slowly and steadily, I'm cooking my way through 'In the Kitchen'. Recipe #17 was the raspberry coconut slice which I made whilst waiting for the raspberry friands to cook (last post). I was actually quite looking forward to this one (it was one of the recipes that got bookmarked when I first went through the book) but somehow took 16 other recipes to get to. Well, I can finally cross this one off the list. It wasn't a huge success as I hoped it to be but I did learn a thing or two.

The recipe called for raspberries, I used frozen raspberries. In most cases, this is fine but not for this slice. Once baked, the combination of melting water and bubbly jam make for a watery/soggy mess. Best to use fresh raspberries.
So the recipe asked for a lamington pan. I thought I'd chosen a big enough pan but alas, it was not the case. Yes the pan I had was just big enough to hold the recipe, but it was definitely not a lamington pan. The confusing thing is that after making the mistake, I googled to see what a lamington pan was and a couple of forums were commenting how there's no standard size. If anything, this so called 'lamington pan' had to be at least 30x20cm for the slice to have turned out ok.
Baked the slice for it's alotted time slot - 40 minutes.
Here's the watery/soggy mess I was talking about.
Here's evidence showing that I used the wrong pan. What I baked was more of a cake than a slice. Way too thick and the texture of the whole thing was more like a sponge cake.
If anything, I guess this post reiterates how small compromises when baking can lead to drastic consequences. I'll probably revisit this one at some point, probably even buy myself a lamington tin for X'mas and hopefully I have better luck next time. Oh well!

Saturday, 28 November 2009

raspberry friands

Back when I blogged on Xanga, I was making friands every other week (there are the blog posts for evidence). I'd alternate between blueberry and raspberry friands, made hazelnut friands when the berries got expensive and overtime, the boy started to get addicted to them. Then the friand making stopped when I started at LCB where I was making much fancier cakes, I started to buy a whole lot of cookbooks (which I continue to do) and well, let's just say that there are way too many recipes out there and the friand got left by the wayside.

The boy recently commented that I hadn't been making friands and that I should make them ('because I like them'). Whilst he supports my baking adventures and does his best to suggest improvements to everything I bake (usually it's me nagging at him going 'but what can I improve'? It can't be just good. It usually drives both him and my mum insane because I never settle for a cake being just good). His favourite is the friand and he'd rather have a friand over the other cakes that are out there.

I used the recipe from 'In the Kitchen' (making this recipe number 16 from the book!). The recipe only makes 9. I'm actually quite curious as to why every friand recipe I've come across either makes 9 or 10 friands. Not one recipe makes 12 friands (so why do I need a 12 hole friand pan?)
Top with raspberries.
Bake for 15-20 minutes. I'm a bit out of practice; my friands turned out a little brown (but still tasty).
Here they are!
I actually do enjoy baking friands but after every batch I make, I'm always left with the dilemna of what to do with the egg yolks. In the past, my dad has used them to add to his omelettes and fried rice, I made creme caramel once and well this time round, I did slightly better and flipped through 'In the Kitchen' (whilst the friands were baking) and found myself a recipe that had egg yolks in it (post to follow).

The boy was happy with his friand, as was mum (I'd say that they are the world's two biggest friand fans). For me. I'm glad that the boy got me to start baking friands again and hopefully I'll be baking some more in due time.

Tuesday, 17 November 2009

blueberry & coconut muffins

It's been awhile since my last 'In the Kitchen' post but trust me, I haven't given up on this book yet. Recipe #15 was a batch of blueberry & coconut muffins baked in a spare moment on a weekend. I just remember there being an urge to bake and within seconds, I was opening up kitchen drawers, pulling things out and no sooner was the batch of blueberry & coconut muffins in the oven baking, I was flipping through the book, and mixing up my next recipe.

Anyway, let's start off with the blueberry & coconut muffins. Whenever I bake now, it's an opportunity for J to practice his photography - look how focused I look in this pic! Haha!
Muffin batter doesn't take long to whip up. The trick is to keep the batter lumpy - don't overmix.
I've seen others neatly scoop out batter with an ice cream scoop but for me, 2 spoons seem to do the trick.
This batch took about 15 minutes to cook. Generally if your muffins are looking like this (golden brown and crunchy on top), they're ready.
I love muffins when they come out of the oven (they smell great and taste great too). This recipe used coconut cream so had quite a rich texture to it - having the one will probably keep you quite full.

So continuing my praises for 'In the Kitchen', this recipe was a real charm and definitely one that I'll use again. I found that with the coconut cream in the recipe, it was better for these muffins to be kept in the fridge and then reheated in the microwave; this way they just seemed to keep for a bit longer. Strangely enough, the recipe only makes 10 muffins but you could always double up the recipe if you need to. Anyway, I've got so many cookbooks fighting for my attention at the moment, will have to keep this post short and sweet!

Wednesday, 12 August 2009

double chocolate chip cookies

This double choc chip cookie recipe from 'In the Kitchen' was probably one of the easiest cookie recipes I've used in awhile. There was no need to fridge the dough, the dough rolled into balls extremely easy without sticking to my hands and most importantly, they tasted great. I'm still a little confused at how I manage to make double the amount of cookies that the recipe said it'll make but it's one of those things which I'll never be able to explain - it happens all the time and I've narrowed it down to one of the following; either cookie recipes call for cookies that are the size of my face otherwise, I can work magic and double the volume of cookie dough. I like to think it's the latter.

The key to a chocolate cookie is choc chips! Mixed choc chips work well - my choice being white choc chips and dark choc chips.
Roll the dough neatly into balls.
Squash the balls down slighly with a fork.
I love how the fork leaves a nice imprint on the cookie once it comes out of the oven. I actually have a billion cookie cutters but I find a fork works quite nicely, especially if you're baking in a hurry.
Cookies everywhere!

Each tray of cookies took about 12 minutes to bake (which is why I love baking cookies! Instant gratification I tell you!) Anyway, they're best enjoyed when they come out of the oven and have had a few minutes to firm up on a cooling rack - this is when the chocolate chips are still half melting with the centres slightly soft. Key is not to overbake else you'll get one tough cookie - take cookies out once they've browned and are slightly firm to the touch. Once out of the oven, they continue cooking from their own heat.

This makes it Recipe #14 from 'In the Kitchen'. At the rate I'm going, it's probably going to take me years to cook everything in that cookbook but anyway, I'm loving every recipe that's coming out of it and it's noticeably getting a little dog-eared (unlike many of the other cookbooks on my shelf).

Monday, 10 August 2009

cheesecake brownies

I baked my first batch of brownies earlier this year and since then, I've been on the lookout for other brownie recipes. There's been a few by Donna Hay which I'm quite keen on but without having to look far, there were two in 'In the Kitchen'; one for a plain chocolate brownie and the other being a cheesecake brownie. With family over for the weekend, I thought I'd give the cheesecake brownie a go.

You see, my mum is always the first to taste test my baking and after trying a piece herself and watching the rest of the family eat their way through the tray, she pronounced this recipe as my best ever yet. She had not seen a tray of brownies go so fast and unfortunately she wasn't quite quick enough to get herself seconds. Here's the recipe for those who are keen on giving it a go:

In a bowl, melt 100g butter and 100g chocolate over a saucepan of simmering water. In a separate bowl, beat 3 eggs, 50g flour and 150g sugar until white and doubled in bulk. To this, add the melted chocolate and pour into a lined lamington tin. In a third bowl, beat 250g cream cheese, zest f 1 lemon, 1 egg and 75g caster sugar until combined.
Pour the cream cheese mixture onto the chocolate mix.
Swirl to incorporate, aiming for a marbled effect.
Bake for 40 minutes, or until cooked through.
Allow to cool before cutting.
Unfortunately I didn't quite achieve the marbled effect. The heavier cream cheese mix seemed to settle to the bottom and form a layer of it's own. But I agree with mum, this is recipe well worth baking again. The tray was gobbled up within the hour and really, that's got to say something!

Admittedly, this isn't the prettiest of brownies. You could dust with some icing sugar to make it slightly prettier but I think the chocolate and cream cheese already give it enough sweetness and once you've tasted it, I guarantee you won't need that dusting of icing sugar - you're hands will be going gravitating to the tray for another piece. Whilst most recipes seem to ask for a good quality chocolate, I used Nestle melts for these brownies and they tasted great so probably no need to spend a whole lot of chocolate - just a regular one will do.

Anyway, this is Recipe #13 I've cooked/baked from Allan Campion & Michele Curtis' 'In the Kitchen'.

Sunday, 2 August 2009

carrot cake

It's been a little busy at work and my time has also been spent studying and trying to finish an assessment so the backlog of posts has built up once again. Fortunately, I'm back up and running and I can finally spend time to visit all my favourite blogs and catch up on everything in the world of eating.

A couple of weeks back, I made the Carrot Cake from 'In the Kitchen'. This makes it Recipe #11 and #12 from the book and was actually one of the first full cakes that I'd baked in years. I used to bake a lot of big cakes but somehow or other, that sorta stopped happening and I caught onto the craze of cupcakes and other small cakes. Muffins are my favourite and often most of my big cake recipes are converted into things that resemble muffins.

This carrot cake recipe asked for quite a number of ingredients which would usually turn me away from the recipe but in this instance, I actually had most of them at home. Here's the batter of flour, cinnamon, mixed spice, eggs, sugar, vanilla, oil and salt.
Add hazelnuts, walnuts and sultanas.
Mix it all together with the grated carrot.
Pour into a lined 23cm cake tin.
Bake for an hour. I ended up baking it for the additional 10 minutes that the recipe suggested.
Once the cake has cooled, top with Cream Cheese Frosting (the recipe for this is so simple - cream cheese, caster sugar and lemon juice).
Carrot Cake!
Carrot cake innards.
Mum liked this cake more than I did. In her words, it was 'healthy tasting', which it was but I prefer a carrot cake that's slightly sweet and really, when you call a cake 'healthy', it really isn't quite a cake! Anyway, I blame it on mum who told me to reduce the amount of sugar when I was making it so that could've been the reason why the recipe didn't seem to work out as well as all the other recipes I've tried out of this book.

And with the amount of time it took to cook this in the oven, the edges did get a little burnt. Reminder to self, any cake that goes in the oven for more than an hour needs to be triple and quadruply lined - I keep forgetting!

Tuesday, 14 July 2009

nutmeg slice

Whilst baking the banana and maple syrup muffins in my last post, I flipped through 'In The Kitchen' to re-bookmark recipes for cooking and somehow or other, decided to make the nutmeg slice as well. So out came the banana and maple syrup muffins and in went a nutmeg slice. Usually mum discourages me from doing more than one lot of baking in a weekend (we just can't eat it all) but thankfully, we were having family over that night and more people could help us eat. I also had all the ingredients for the slice at home and it was just a matter of measuring everything out and it worked out well that baking the nutmeg slice, I used up ingredients that were nearly finished anyway.

Admittedly, making the slice was a bit more work than usual. Muffins - you don't need to do a whole lot (actually it's best that you leave muffin batter lumpy). With the slice I was making, there was a base as well as the filling. Probably the most time consuming was this biscuit base (combo of flour, butter and brown sugar) which took some time to crumb together so that it resembled fine bread crumbs.
Line a tin with baking paper and assemble the base. Try to keep it thin.
The filling is actually half the biscuit base with all the wet ingredients (milk + eggs). Don't forget the key ingredient - 1 tsp of ground nutmeg.
Pour over the biscuit base.
Top with flaked almonds.
Bake for 30 minutes.
Allow to cool before slicing into squares.
To be honest with you, I was quite nervous baking this slice. It wasn't that the recipe was hard, if anything it was easy to follow as are all the recipes. My main concern was around the key ingredient - nutmeg. The bottle of nutmeg was floating around in one of the kitchen drawer (the last time I used it would've been to make Nigella's Cabonara) and well, nutmeg just isn't a common ingredient for baking (well not for me anyway). Mixed with the fact that I come from an Asian household, it just isn't one of those ingredients that we're familiar with.

As the slice was baking, I caught the scent of the nutmeg and even when the tray came out of the oven, I was sniffing at the slice to see whether it was edible. Nutmeg has a very distinctive taste which I'm not sure will actually attract you to the slice if you're just smelling it but I took my baby steps and had a taste of it. OMG - this recipe produces the lightest of biscuit bases and such a moist topping. The flaked almonds just top the cake! I was out that night but mum gave me some very positive feedback when I spoke to her the next day. Apparently everyone loved it and well, there wasn't even the slightest mention of using nutmeg!

Anyway, that makes it Recipe #10!

Monday, 13 July 2009

banana & maple syrup muffins with maple syrup frosting

I learnt something new this weekend and I wonder if people actually know that there's 'Maple Syrup' and 'Maple Flavoured Syrup'? Up till two days ago, I would've thought that both were the same thing until I had a good look at the supermarket and realised that Maple syrup was almost 5 times more expensive than Maple flavoured syrup. And well, a bit of marketing works and it was actually a wobbler on the Maple syrup bottle that caught my attention.

The Maple syrup bottle with the wobbler. Yes, I work in advertising and I still get sucked in by marketing! This was almost $10 for the bottle.
The plan for this weekend was to make the banana & maple syrup muffins with the maple syrup frosting from 'In the Kitchen'. FYI: This was actually the first two recipes I'd put a post it against when I got the book and well, it ends up being the 8th and 9th recipes that I'm cooking (it'll be awhile till I get to the 1000 or so recipes that are in this volume). 

Start by mashing the bananas and caster sugar. The mistake I made here was that the bananas just weren't ripe enough. I nearly doubled that fork over trying to mash the banana - somehow managed in the end but I urge you to wait till your bananas are ripe and browning.
Unfortunately, muffin mix doesn't look that great especially when you've got banana in it.
Into the muffin cases for baking. Again, true to its word, the recipe gave me 10 equally sized muffins.
The muffins took about 20 minutes to bake. Whilst the tray was in the oven, I got started with the Maple syrup frosting - basically 3 tbsp of maple syrup with 100g of soft cream cheese.
It doesn't look like a lot of frosting but trust me, just a little bit of frosting is enough to top the muffins.
The muffins are done!
When my uncle came over, he asked me whether I'd filled up a piping bag just to ice the 10 muffins that I made. Yes I did - he thought I went to a lot of effort just for 10 muffins but it's well worth it in the end.
Look how pretty they are! The piping isn't the best but I think these muffins with the piped icing look better than just smearing the frosting on with a knife.
I knew already that banana wasn't ripe enough and when I had a taste of one of these, you could easily taste the rawness of the banana. However, the texture of the muffin was moist as has been all the muffin recipes I've used out of this book - the maple syrup frosting went down as a treat with the muffins (gave it a sweetness which I think is just right).

There's still a few more muffin recipes yet to go in the book. I do love a good muffin and so far, the recipes just seem to get better!